Installing Stata on Linux
Properly installing Stata in Linux is surprisingly cumbersome, and I’ve found that even Statacorp’s own guide is incomplete and outdated. So here’s mine.
I have installed Stata in many Linux systems, but this guide was originally written for Ubuntu 16.04.
Having said that, I’ve checked that it works in many other Ubuntu-based and Arch-based distros, up to Ubuntu 22.10.
This guide was originally written for Stata 14, so many references mention that version (e.g. mkdir /usr/local/stata14).
Evidently, you should change those references to your version of Stata.
The methods mentioned here have been tested with versions 13 through 17.
Prerequisites
- You should already have a tarball (a file with
.tar.gzextension) with the appropriate installation files for your operating system, and - you’ll need root privileges in your system for some steps.
Installation
Install script
Change directory to wherever you have the
.tar.gzfile (e.g. the Downloads folder,~/Downloads). There, create a temporary folder to store the installation files (e.g.statainstall), and extract the installation files to that folder.cd ~/Downloads mkdir statainstall tar -xvzf Stata14Linux64.tar.gz -C statainstallCreate the installation directory, and change location into it.
sudo mkdir /usr/local/stata14
cd /usr/local/stata14
From the installation directory, run the install script included in the installation files. Follow the install instructions until completed.
sudo ~/Downloads/statainstall/install
License
In order you configure the license file you just need to run ./stinit (you’ll need root privileges to write the file). Be sure to have the serial number, code and authorization. No need to disconnect from the interwebz here, even if you have an “alternative” license ;).
Run
sudo ./stinit
At this point you can also delete the temporary installation folder:
rm -r ~/Downloads/statainstall
Add directory to path
It is more convenient to run Stata just by typing stata (or xstata for the X-window version) in the terminal, instead of having to type the full path to the executable (e.g. /usr/local/stata14/xstata-mp).
In order do this, you’ll need to add the installation directory to the system path.
Add one line at the end of your
.bashrcfile (or equivalent, depending on your shell) to add Stata to the system path.echo export PATH="/usr/local/stata14:$PATH" >> ~/.bashrcYou need to source your
.bashrcso that the changes are effective.source ~/.bashrc(You can also just restart your terminal.)
Running Stata
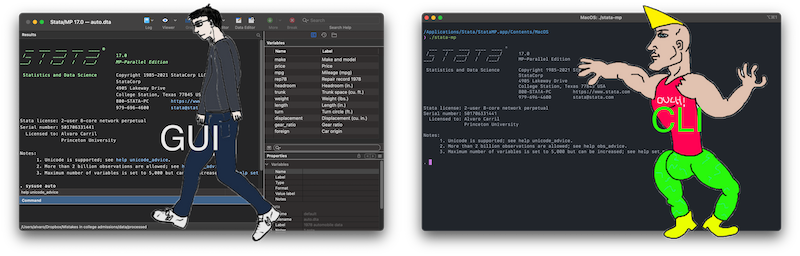
After adding the install directory to your path, you should be able to run the program directly. Stata can be run in two ways: the X-window version (GUI based) and the terminal version:
# GUI version
xstata

# CLI version
stata
Additionally, you can add -<edition> to the call, where <edition> is the Stata edition you have a license for.
For example, I have a license for Stata MP, so I can run the X-window version with
xstata-mp
Obviously you’ll need to substitute mp for whatever version you have a license for.
Updating
It is important to check if you’re version of Stata is up to date.
You can head here to find more information on updating.
If you have an internet connection you can simply run update query to check automatically.
However, if you have an “alternative” license you’ll want to do a manual update (i.e. without internet access).
You may run into permissions errors while attempting an update: after running update query (online updating) or update db (manual, offline updating) you can get something like
cannot write in directory /usr/local/stata15/.tmp
r(603);
This happens due to permission issues in the install folder, but it’s easily fixed.
Before attempting to update, you can either start Sata with sudo (eg. sudo xstata-mp), or temporarily change the folder’s permissions:
sudo chmod 777 -R /usr/local/stata15
If you do the latter it would be advisable to revert to the default permissions with
sudo chmod 755 -R /usr/local/stata15
Additional improvements
I have identified the following potential issues you may have after installing Stata in Linux:
- Interface has no icons (ie. only question marks)
- Program doesn’t have an application menu entry (ie. can’t search for the app)
- Mimetype associations don’t work (ie. you can’t double click a
.dtafile and have it open in Stata) - PDF documentation links don’t work
If you want to solve the first three of these issues at once with little messing around, you can use Daniel Bela’s stata-integration, which is a bundled Linux binary script integrating an already installed Stata instance into the desktop environment.
I’ve tried the script and it works as advertised, solving all above issues.
However, it runs some binaries in sudo, so you may be uncomfortable with that.
If you would rather fix these issues manually, you can check out the sections below.
Interface icons
Although it is only a aesthetic annoyance, it is annoying to have an interface with no icons:
Friend and colleague Kyle Barron, who I met at the NBER, has written a fix for this issue.
The main advantage of Kyle’s solution is that it doesn’t require sudo privileges.
Unity launcher and desktop file
Even after successfully installing and running Stata, in Ubuntu it won’t be available as an application in the dash, and it won’t have a proper icon in the application launcher. We can easily fix this by creating a .desktop file for Stata.
sudo gedit /usr/share/applications/stata14.desktop
In this newly-created file just copy and paste the following, obviously adjusting it if you have a different version or flavor of Stata:
[Desktop Entry]
Version=14.2
Terminal=false
Icon=/usr/local/stata14/stata14.png
Type=Application
Categories=Education;Scientific;
Exec=/usr/local/stata14/xstata-mp
Name=Stata/MP 14
Comment=Perform statistical analyses using Stata.
StartupNotify=true
MimeType=application/x-stata-dta;application/x-stata-do;application/x-stata-smcl;application/x-stata-stpr;application/x-stata-gph;application/x-stata-stsem;
Actions=doedit;use;view;graphuse;projmanag;semopen;
After saving this file you should be able to find Stata from the Unity dash, and when launched it should have its icon.
Adding mimetype associations
Adding mimetype associations for Stata files allows you to see Stata files (e.g. do files, dta files) with their proper icons, and more importantly, to be automagically opened in Stata when executed. This is the default behavior in Windows or Mac, but with Linux we have to do a bit of extra work.
First download this tarball with Stata icons and extract it wherever you like.
In the terminal, go to the location where you have extracted the icons and then change directory to the PNG icons that correspond to your version of Stata. Then issue the following commands:
xdg-icon-resource install --context mimetypes --size 256 stata-dta_256x256x32.png application-x-stata-dta
xdg-icon-resource install --context mimetypes --size 256 stata-do_256x256x32.png application-x-stata-do
Create and edit the mimetype definitions with the following command:
sudo gedit /usr/share/mime/packages/application-x-stata.xmlThen copy the following inside this newly created file, and save.
Finally, update the mime and desktop databases so that changes take effect.
sudo update-mime-database /usr/share/mime
sudo update-desktop-database /usr/share/applications/
That’s it! You should now have a fully functional, “pretty” version of Stata on your Linux system. With a bit of extra work, you can complete the job and add mimetype associations for more obscure Stata files. For instance, you can associate do and ado files to be opened up by your favorite editor instead of Stata’s default do-file editor.
PDF documentation
The PDF manuals are loaded by a script named stata_pdf, located inside your Stata installation directory (eg. /usr/local/stata15/stata_pdf).
By default the script points to Acrobat Reader (acroread), but Adobe discontinued it around 2014 (good riddance). We can make some edits to stata_pdf so that it uses Evince, which is the default PDF reader in many Linux distros.
First, it always advisable to backup the original file:
cp /usr/local/stata15/stata_pdf /usr/local/stata15/stata_pdf_bkp
Now we edit the script with nano (or whatever you prefer):
nano /usr/local/stata15/stata_pdf
Scroll past the commented text and modify it so that it reads like the following block.
It boils down to three edits: cmd="evince" in second line and the first two wharg=....
case "$PDFVIEWER" in
"")     cmd="evince"
        ;;
*)      cmd="$PDFVIEWER"
        ;;
esac

case "$1" in
"-page")        pagenum=$2
                fname=$3
                wharg="--page-label=$pagenum"
                ;;
"-section")     section=$2
                fname=$3
                wharg="--named-dest=$section"
                ;;
*)              fname="$1"
                wharg=""
                ;;
esac

exec $cmd $wharg "$fname"
Known issues
- If you have a dark GTK+ theme enabled (e.g. the dark variant of Arc, my theme of choice), the X-window version of Stata looks awful. I tried solving this by executing
xstatawith a different GTK theme; i.e. something likebut apparently GTK+ 3 applications have to be coded to respect theExec=env GTK_THEME=Arc xstata-mpGTK_THEMEenv variable, and Stata is not. I suspect some answers in this and this questions might contain possible solutions, but I just switched to a light variant of Arc and called it a day.